How To Photo Wall Gallery

A few days ago, I came across an awesome offer on my Facebook newsfeed (courtesy of thekrazycouponlady) for 2 free 8x10s and 50 free 4x6s from www.shutterfly.com.I've been wanting to create a photo wall gallery in my dining room for some time, but didn't want to spend a ton on printing pics...so the timing of this offer couldn't have been more perfect!So here it is, my newly created photo gallery of the fam! (I was even able to include some new pics of Leah...my little Buddha)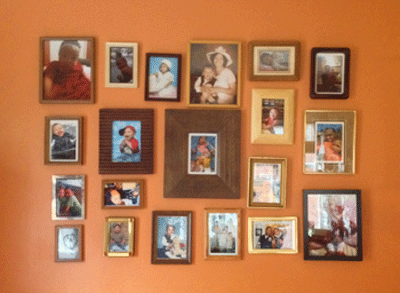 My little Landon gets a kick at looking at himself (I've caught him staring a few times...he's soooo into himself...I find it to be so cool)This project took some time to execute only because the preparation part was so time consuming, but very well worth it (my walls are thanking me as I type...wink, wink, no extra holes on the walls).
Measure, Measure
First I measured the space on the wall where I wanted to place my pics.
Lay Them Out
Then I layed out the pics on the floor and scrambled them around until I was satisfied with a layout.

Trace Away
Then I traced each pic on construction paper.
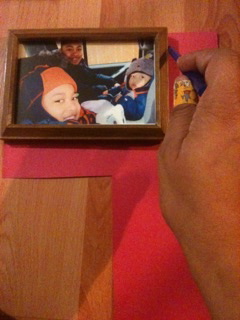 To make it easier to hang my frames, I applied a little pressure on the paper so that I could make an impression of the hardware on back of the frame used for hanging.
Tape Up My Cut Outs
Once I finally finished tracing all of my frames and made impressions of the hardware, it was time to mount my cut outs on the wall using good ol' scotch tape.What's great about using cut outs for this project is that it allows me to play with my layout and move around any pieces that don't seem right without nailing holes all over my walls.Here's my final layout...
Make It Straight
Now time to grab my lever (want to make sure my cut outs are leveled before I start hammering away).I also like to label my cut outs to remind me of the pic that I traced, you can also number the pics, but I find that labeling them is easier for me since I tend to change my mind concerning the "final" layout (I also go a little OCD and take a picture of my final layout using my phone. Anything to help my post pregnancy brain remember things).
Hammer Time
Once all cut outs are nice and leveled...in the words of MC Hammer..."it's hammer time, oh, oh, oh, oh" (my fave part, but not my hubby's...he complains every time I grab the hammer for my projects. Did I mention that I decided to complete this project at 1am?)Here's a pic showcasing the wall mounts. I placed them on the impressions that I made while tracing my cut outs (making it easy peasy for mounting my frames and I love easy peasy...especially at 1am!)

Mounting Time
Now time to mount my picture frames and presto....my photo gallery has been born!
I'm truly happy with how it turned out, it really adds a personal touch to our dining room. I'm sure it'll be a conversation piece for years to come.Oh and by the way, I began collecting frames for this project during my trips to the Goodwill store and flea markets (the most expensive frame cost $3 buckaroos...so all in all this project cost me about $40 buckos!
Items Used:
-Frames-Construction Paper-Pen/Pencil-Level-Picture Frame Wall Mounts or Nails-Scotch Tape
Your turn!
Will you be giving a photo wall gallery a try in your room? Tell me all about it in the comment section below.